Dhan
How To Connect Your Dhan Account?
Buildalgos.com simplifies algorithmic trading by offering easy integration with multiple brokers, including Dhan.
This guide walks you through the steps to connect your Dhan account with Buildalgos, enabling you to automate your trading strategies effortlessly.
Step 1: Login to Your Dhan Account
- Go to https://login.dhan.co/ and log in with your Dhan credentials.
- Click on your profile picture in the top-right corner.
- Select Access DhanHQ API’s.

Step 2: Generate API Key
Important: Select API Key Mode
Before generating your keys, ensure the toggle is switched to API Key (NOT Access Token).
This is required because BuildAlgos authenticates using:
- API Key
- API Secret
If the toggle is left on Access Token, the generated keys will NOT work with BuildAlgos.
![]()
Step 3: Create App
- Click Generate.

- Under the Generate New API Key section, enter the following details:
- Application Name
- Redirect URL
⚠️ Important:
You must use the specific Redirect URL generated by Buildalgos for the integration to work.
Go to : https://buildalgos.com/dashboard/brokers
Click On "Add Broker".
Select Dhan from the list.
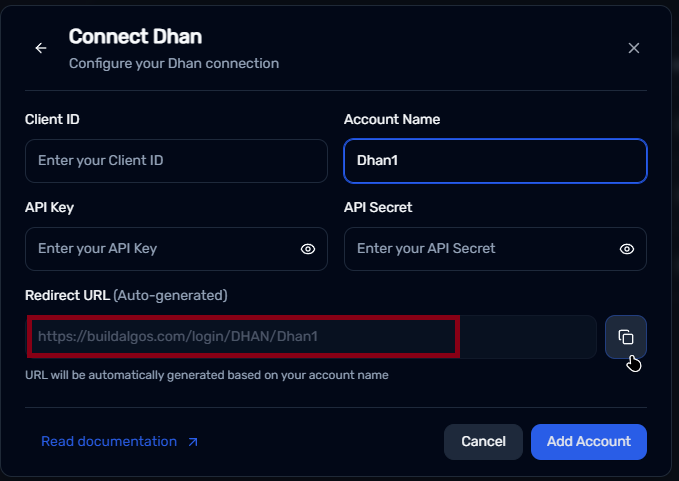
Once you enter your Account Name, your custom Redirect URL will appear automatically.
Copy this URL and enter it into your Redirect url field.

- Click Generate API Key
Step 4: Generate API Key
- After registration, you will receive:
- API Key
- API Secret
Store them securely, you will need these keys to connect your Dhan account to Buildalgos.
Step 5: Add Broker
- Go to https://buildalgos.com/dashboard/brokers
- Click Add Broker
- Select Dhan from the list.

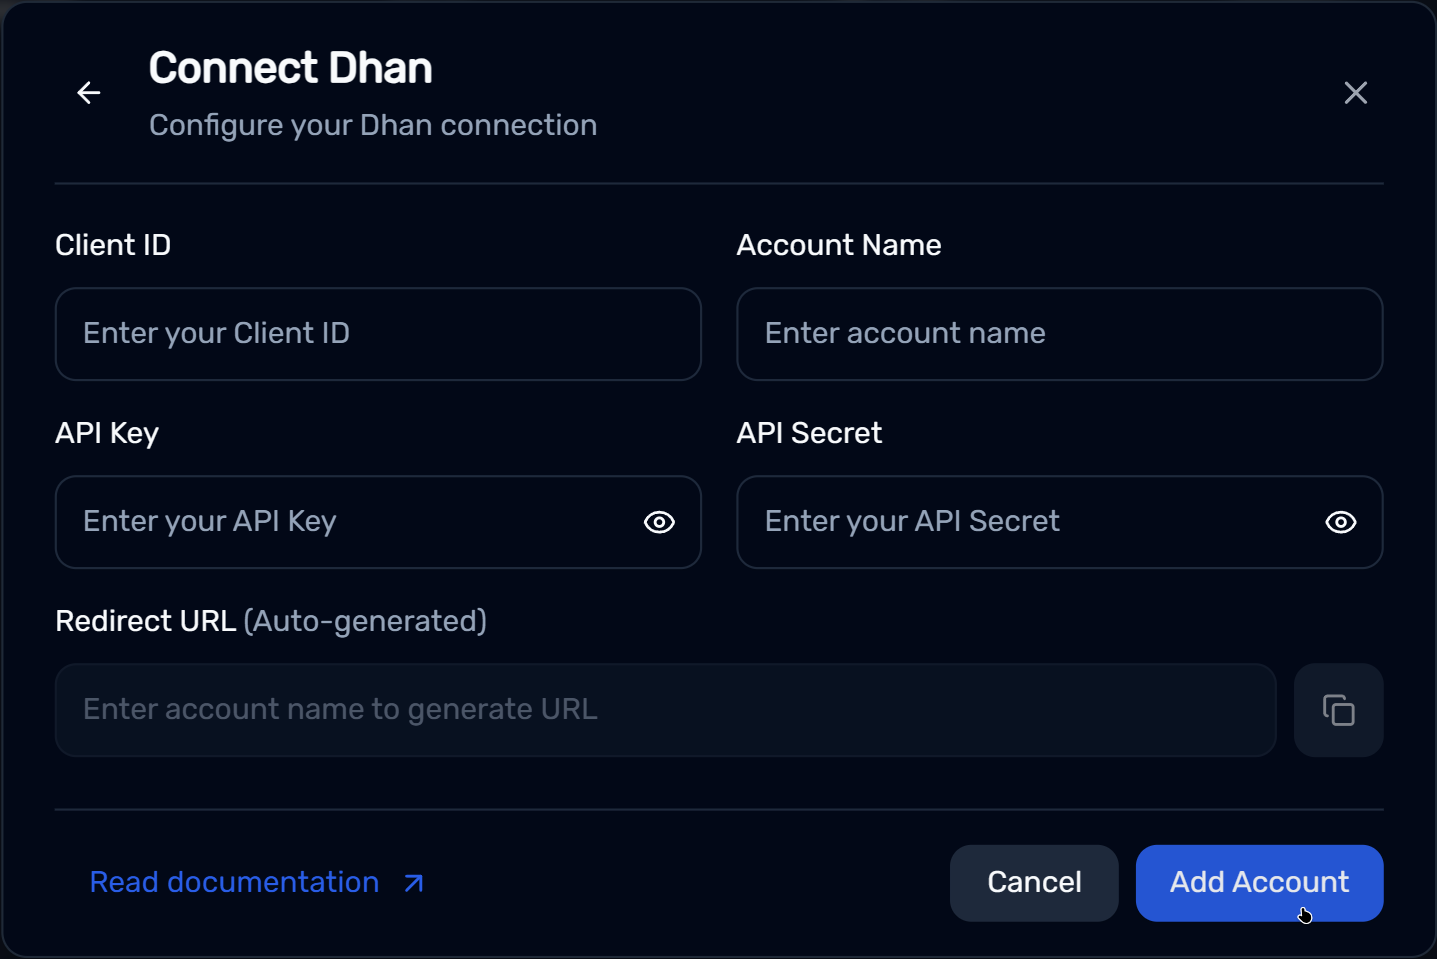
Step 6: Enter Credentials
- Client ID → Your Dhan account Client ID
- Account Name → Enter the same Account Name that you used while generating the Redirect URL in Step 3.
- API Key → API Key generated in Step 4
- API Secret → API Secret generated in Step 4
- Click Add Account.
Step 7: Start Trading!
- Once your broker is added, it will appear in your dashboard. Click Login.
- You will be redirected to the Dhan website — enter your login details.
- After successful authentication, Buildalgos will show “Logged In Successfully”.
- To start trading, click the play icon under the Trade column.
- To stop/pause trading, click the pause icon under the Trade column.
- Your Dhan account is now fully connected to Buildalgos!
By completing the steps in this guide, you've successfully set up your Dhan account to work with Buildalgos. You're now ready to optimize your strategies and make smarter, data-driven decisions. If you need help or run into any issues, feel free to consult the Buildalgos resources. Happy trading!